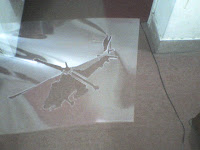
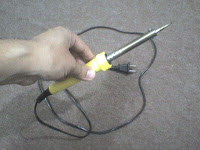
Here I have written a basic tutorial on how to print stencil art on t-shirt. I have tried various methods mentioned online, and after some basic changes, I have developed this very simple and efficient method :)
Things you need:
1. Some A4 size transparency sheets. (used for presentations)

Things you need:
1. Some A4 size transparency sheets. (used for presentations)

2. A simple box cutter.
3. A cheap 20 - 40 watt soldering iron.
4. A simple printer for black and white prints.
5. Spray Paints.
6. Masking tape or Duct Tape.
7. Scrap papers, tissues and newspaper.
Step-1:

Take the picture you want to stencil, and convert it in to black and white through microsoft word or adobe photoshop after messing around with it. Its easy to figure out the right combination of black n white through grayscale editing of picture.

Take the picture you want to stencil, and convert it in to black and white through microsoft word or adobe photoshop after messing around with it. Its easy to figure out the right combination of black n white through grayscale editing of picture.
Step-2:
Print the picture on a white A4 sheet using any cheap printer.
Step-3:
Tape a transprency over the sheet, and fill any remaining missed stops with black marker or whitener fluid.
Step-4:
Tape a transprency over the sheet, and fill any remaining missed stops with black marker or whitener fluid.
Step-4:


Switch on the soldering iron, and when its hot enough in 2-3 minutes, just trace over the transparency sheet on picture.
Step-5:
Simply pull off the transparency sheet from the paper, and use the box cutter to cut any remaining smaller parts missed by the soldering iron. Your stencil is ready to be tested.

Simply pull off the transparency sheet from the paper, and use the box cutter to cut any remaining smaller parts missed by the soldering iron. Your stencil is ready to be tested.


Step-6:
Place your stencil somehwere, and test it. I use my rooftop to test new stencils.
Step-7:
Put some stick-on glue on back side of stencil, and place it on an ironed t-shirt and press it, till it sticks, with no opened spaces. Use the masking tape to cover the sides with newspaper and scrap paper.


Place your stencil somehwere, and test it. I use my rooftop to test new stencils.
Step-7:
Put some stick-on glue on back side of stencil, and place it on an ironed t-shirt and press it, till it sticks, with no opened spaces. Use the masking tape to cover the sides with newspaper and scrap paper.


Step-8:
Spray 4-5 times in layers on the t-shirt from a distance. I find the 'flat black' spray paint to be the best as it has rough texture, and it does not smudge or cross t-shirt layers.
Step-9:
For miniature stencils, glue the stencil as told before, and use the liquid acrylic paint and use a small paint brush andcover the stencil with single strokes in same direction. This not only saves paint, but also provides a very sharp image. The important thing is to use minimum layers of paint when using the brush, so it wont smudge or scrape off later.
Precautions:
NEVER handwash a spary-painted or brush-painted t-shirt.
Preconditions:
Be creative, and outrageous!! ;)


